Casting concrete cylinders in the field is one of the most important steps in the concrete testing workflow. By this point, the fresh concrete sample has been collected, temperature has been measured, slump has been checked, wet density may have been determined, and air content may have been verified.
Now, the focus shifts from the fresh concrete properties to the hardened concrete performance.
Concrete cylinders are cast in the field so they can later be cured and tested for compressive strength. Those strength results help determine whether the concrete delivered to the project meets the specified requirements. These cylinders become the physical record of the concrete placed on the job.
That is why proper molding, identification, curing, and handling matter. A cylinder that is poorly made, or poorly cured, may not reflect the actual quality of the concrete. And when that happens, the result is unnecessary questions, delays, retesting, or unwanted project disputes.
This post focuses on the next step in the fresh concrete field testing workflow: making and curing concrete test cylinders in accordance with ASTM C31/C31M.
ASTM Reference
ASTM C31/C31M
Why Concrete Cylinders Are Cast in the Field
Concrete cylinders are most commonly used to evaluate compressive strength. After they are made in the field, cylinders are transported to the laboratory, cured under controlled conditions, and tested at specified ages, often including 7-day and 28-day breaks.
Standard-cured cylinders are generally used for acceptance testing, strength verification, and quality control. Field-cured cylinders may be used for different purposes, such as evaluating in-place curing conditions, determining when forms or shoring can be removed, or assessing when a structure may be placed into service.
Those two purposes should not be mixed casually. A standard-cured cylinder and a field-cured cylinder tell you different things. One is intended to evaluate the concrete under standardized curing conditions. The other is intended to provide insight into the concrete as it is being protected and cured in the structure.
That distinction matters because strength testing is only useful when the specimen actually represents what it is supposed to represent. A bad cylinder creates a bad conversation very quickly.
Materials Required
- 4 x 8 in. or 6 x 12 in. cylinder molds with lids or covers
- Tamping rod appropriate for the mold size
- Rubber or rawhide mallet
- Scoop, shovel, or other sampling tool
- Float, trowel, or strike-off tool
- Labels or permanent marker
- Initial curing box, water tank, or other curing setup
- Personal protective equipment for working with fresh concrete
Before Casting the Cylinders
Start with a representative concrete sample. That sounds basic, but it is where reliable strength testing begins.
The sample should be collected in accordance with ASTM C172/C172M and protected from contamination, sunlight, wind, and evaporation before testing and molding. The concrete should be remixed in the sample container, so the material used for the cylinders is uniform.
Timing also matters. Fresh concrete testing should begin promptly after the sample is collected, and cylinder molding should begin within the required time window. The longer the sample sits exposed to sun, wind, heat, or cold, the more opportunity there is for the material in the wheelbarrow to drift away from the material placed in the structure.
Do not let the sample become its own science experiment.
Procedure
Place the cylinder molds on a firm, level surface near the location where they will be stored for initial curing. Molds should be clean, properly assembled, and ready before concrete is placed.
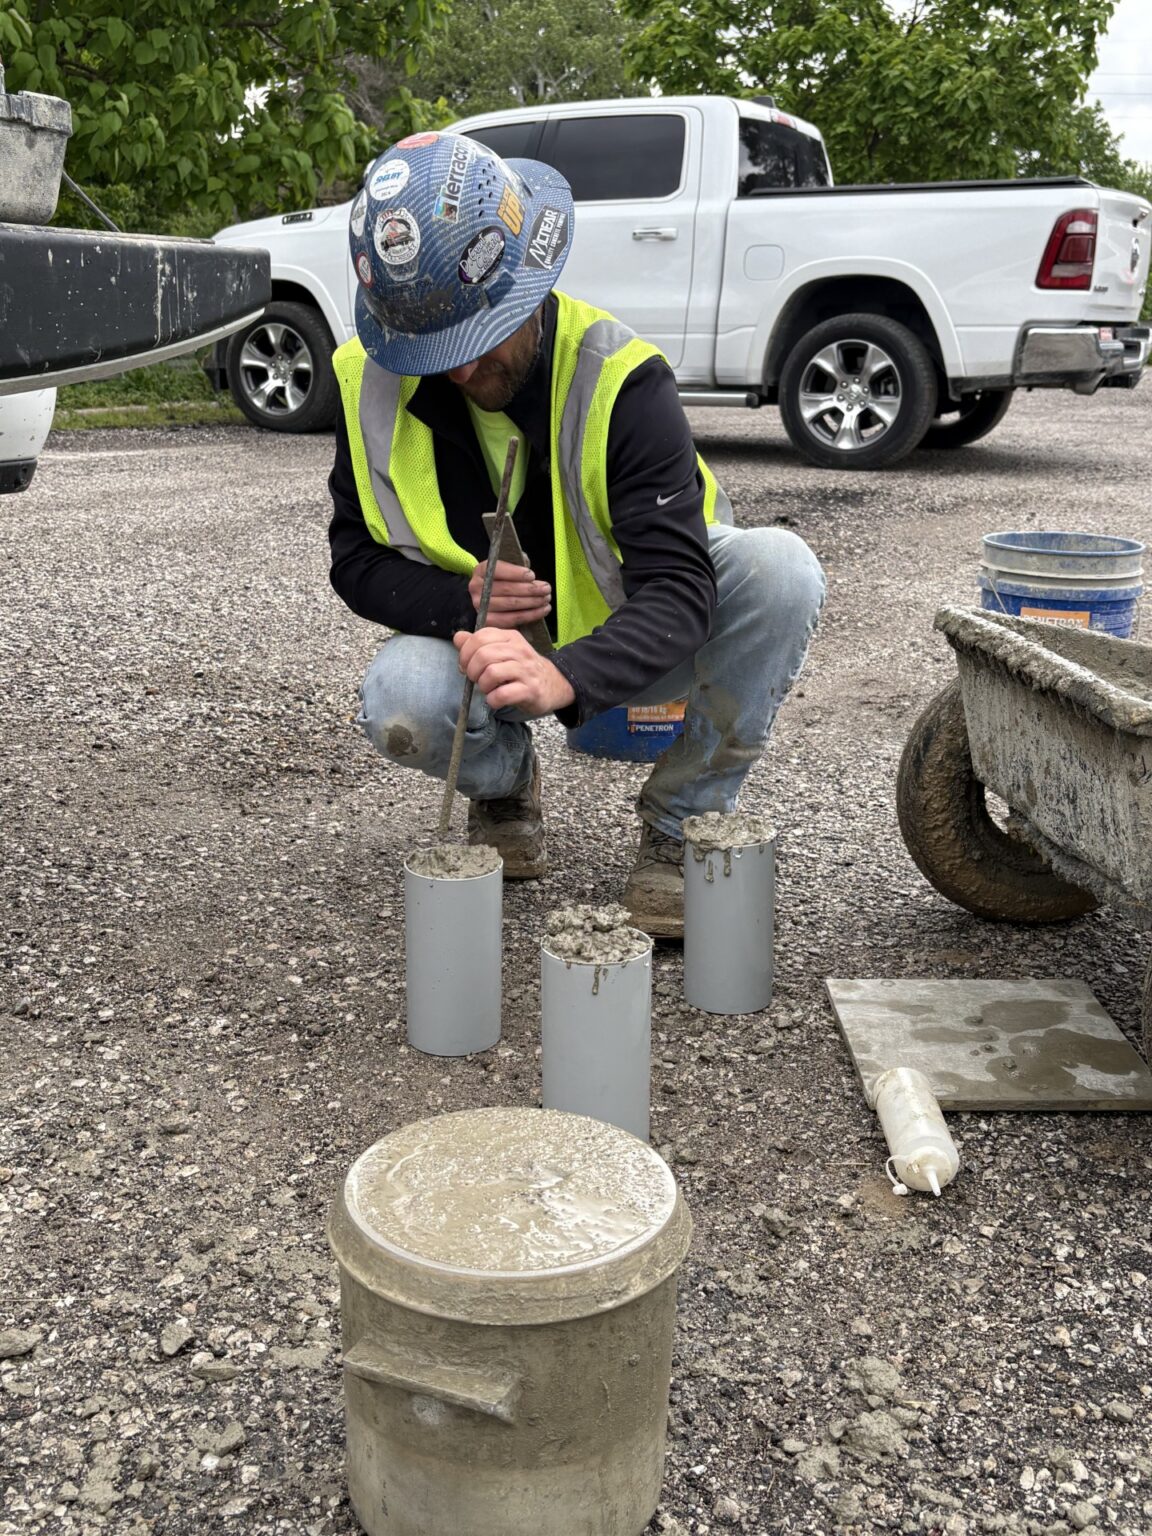
Fill the molds in the required number of layers based on mold size and consolidation method. For rodded specimens, 4 x 8 in. cylinders are typically filled in two equal layers, while 6 x 12 in. cylinders are typically filled in three equal layers.
Use a scoop or shovel to place the concrete into the mold, distributing it evenly as each layer is added. Avoid dumping concrete into one side of the mold and forcing it around after the fact. The goal is to create a consistent specimen without unnecessary segregation or trapped voids.
Rod each layer 25 times using the proper tamping rod. For the bottom layer, rod through the full depth of the layer. For upper layers, the rod should penetrate about one inch into the layer below. This helps knit the layers together and reduces the risk of creating separate planes within the specimen.
After rodding each layer, tap the outside of the mold 10 to 15 times with a rubber or rawhide mallet. This helps close holes left by the rod and release large, trapped air pockets. The tapping is not decorative. It is part of the consolidation process.
When the final layer has been placed and consolidated, strike off the surface so the concrete is level with the top of the mold. A float, trowel, or strike-off tool can be used to create a flat, even surface.
Clean excess concrete from the outside of the mold and cover the cylinder with a lid or other appropriate cover to prevent moisture loss.
Labeling and Traceability
Each cylinder should be clearly identified on the outside of the mold. Labels should not be placed only on the lid, because lids can be separated from molds during handling, curing, or transport.
At a minimum, identification should connect the cylinder to the project, sample, placement location, date, time, truck or batch information when applicable, and intended test age.
This is a small field detail that can prevent a very large headache later. A perfectly cast cylinder with questionable identification is not very useful. The lab needs to know exactly what that specimen represents, where it came from, and when it is supposed to be tested.
Initial Curing in the Field
Once cylinders are cast, they need to be moved carefully to the initial curing location. Freshly molded cylinders should be supported from the bottom and handled gently to avoid disturbing the concrete before it has hardened.
Initial curing conditions are critical. Cylinders should be stored on a level surface, protected from direct sunlight, wind, freezing temperatures, vibration, and other jobsite conditions that could affect early hydration.
Temperature control is especially important. If cylinders are left in the back of a truck, sitting in direct sun, exposed to freezing weather, or stored in an uncontrolled corner of the site, the test results may reflect poor cylinder handling more than poor concrete quality.
That is the kind of problem that can send everyone chasing the wrong issue.
Transporting Cylinders to the Lab
Cylinders must be transported carefully after the initial curing period. They should be protected from damage, moisture loss, and temperature extremes during transport.
The trip from the jobsite to the lab should be handled as part of the testing process, not as an afterthought. Rough handling, excessive vibration, or poor environmental protection can compromise the specimen before it ever reaches the compression machine.
Once the cylinders arrive at the lab, they continue through the curing and testing workflow until the required break age.
Forney Fact
Cylinder casting is where field testing turns into future strength data. Poor consolidation, poor curing, weak labeling, or rough transport can all create strength results that raise questions later.
The best cylinder is not the one that looks neat on top. It is the one made from a representative sample, consolidated correctly, cured properly, labeled clearly, and traceable from the field to the lab.
With concrete cylinders cast and initial curing underway, the next step in the workflow is making sure those specimens are properly tracked, transported, cured, and tested for compressive strength.